By Mesterinne Aleydis van Vilvoorde/Eva Andersson

This cap is inspired by 14th century Italian art, where you sometimes see both women and men wearing small skull caps. One example, shown below is the Birth of the Virgin by the Master of the Ashmolean Predella c 1365-137
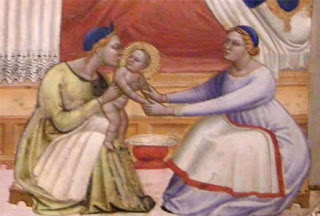

You can see a much better quality image on the Ashmolean web site.
While we do not know if these caps were sewn from fabric, felted, knit, or made by some other technique like sprang, knitting is a plausible interpretation; given both how they look, and the fact that guilds for knitters of caps and gloves were present in many European countries in the 14th century ( Turnau, Irena, History of knitting before mass production, Akcent, Warszawa, 1991, pp 20-23)
Yarn and needles
I used 2 play sport weight wool yarn from Kampes (300 m/100 grams or 328 yd/3.53 ounces), a Swedish spinnery, but any non superwash wool yarn can of course be used. Since it is important that you will be able to felt it a little, superwash will not work. There are yarns specially made for felting, but I used what I had at home. Felting will shrink the cap, depending on how much you felt it.
I used a 2,5 mm (US 1 ½) cable needle, and when the decreases made the cable needle too large, 2,5 mm double pointed needles. Magic loop is of course also an option, in which case you won’t need the DPNs except for the I-cord in the end.
Pattern
Cast on 136 stitches
Join, mark the start of the row with a marker, and knit until the cap has a height of 6 cm.
Next row:
Knit 15 stitches, knit two together, repeat until the end of the row
Knit 3 rows
Knit 7 stitches, knit two together, knit 14 stitches, knit two together, repeat, ending with knit 7 at the end of the row.
Knit 3 rows
Knit 13 stitches, knit two together, repeat until the end of the row
Knit 3 rows
Knit 6 stitches, knit two together, knit 12 stitches, knit two together, repeat, ending with knit 6 at the end of the row.
Knit 2 rows
Knit 11 stitches, knit two together, repeat until the end of the row
Knit 2 rows
Knit 5 stitches, knit two together, knit 10 stitches, knit two together, repeat, ending with knit 5 at the end of the row.
Knit 1 row
Knit 9 stitches, knit two together, repeat until the end of the row
Knit 1 row
Knit 4 stitches, knit two together, knit 8 stitches, knit two together, repeat, ending with knit 4 at the end of the row.
Knit 7 stitches, knit two together, repeat until the end of the row
Knit 1 row
Knit 3 stitches, knit two together, knit 6 stitches, knit two together, repeat, ending with knit 3 at the end of the row.
Knit 1 row
Knit 5 stitches, knit two together, repeat until the end of the row
Knit 1 row
Knit 2 stitches, knit two together, repeat until the end of the row
Knit 1 row
Knit 2 stitches, knit two together, repeat until the end of the row
Knit 1 row
Knit 2 stitches, knit two together, repeat until the end of the row
Knit 1 row
Knit 1 stitch, knit two together, repeat until the end of the row
Knit 1 row
Knit two together, repeat until the end of the row
Knit 1 row
Knit 1 stitch, knit two together, repeat until the end of the row = 4 stitches
Move the 4 stitches to one DPN, make an I-cord c. 2-3 cm long.
Making the I-cord
Knit all stitches.
Slide the stitches back to the beginning of the DPN.
Bring your yarn around the back and start knitting again. Make sure to pull the first stitch tightly, drawing the loop closed.
Cast off and weave in the ends with a darning needle.
If you sometimes end up with extra stitches by the end of a row, just keep going, it will probably end up right in the end, otherwise just make a decrease during one of the knit rows and it will all work out.
This is how my cap looked just off the needles.

Felting and shaping
Fill a basin with hot water with soap (I use såpa, a liquid Swedish soap) an put the cap in it. Let the cap soak up the water and pull it to even the tension of the stitches.
I use my feet to felt the cap, but you can also use your hands of course – kneading and rubbing the knit fabric to make the wool fibres lock together. You can also wash the cap in the machine, but then you, of course, have much less control of the felting process.
When you have felted the cap as much as you like, you shape it - I used an upturned bowl that I let it dry over.
